

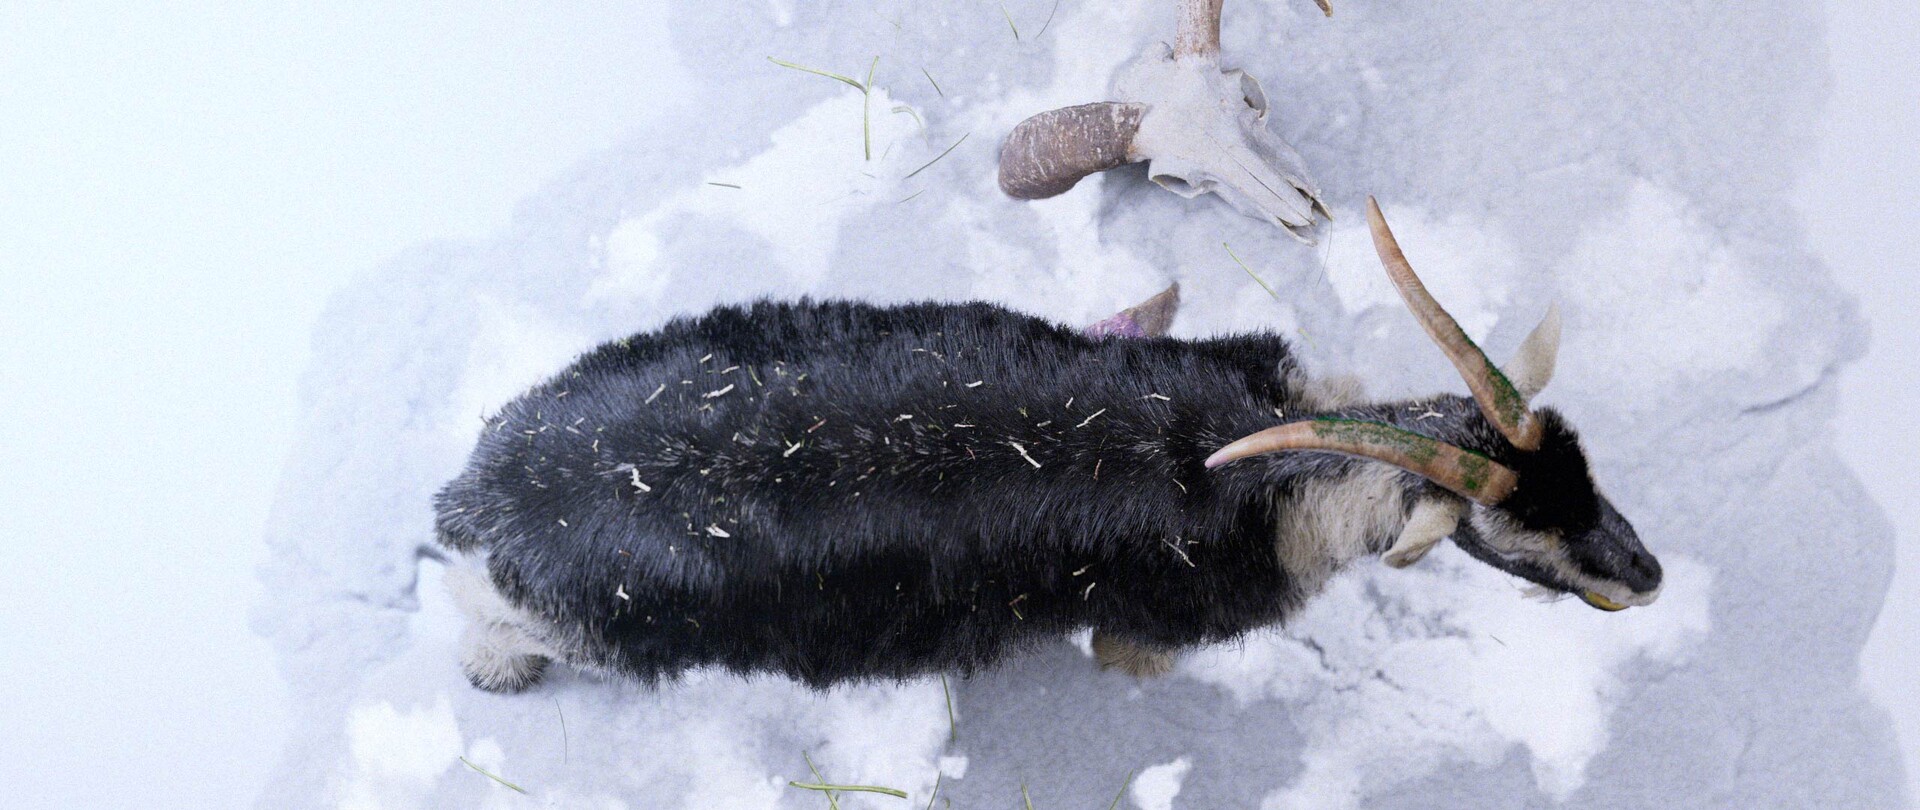
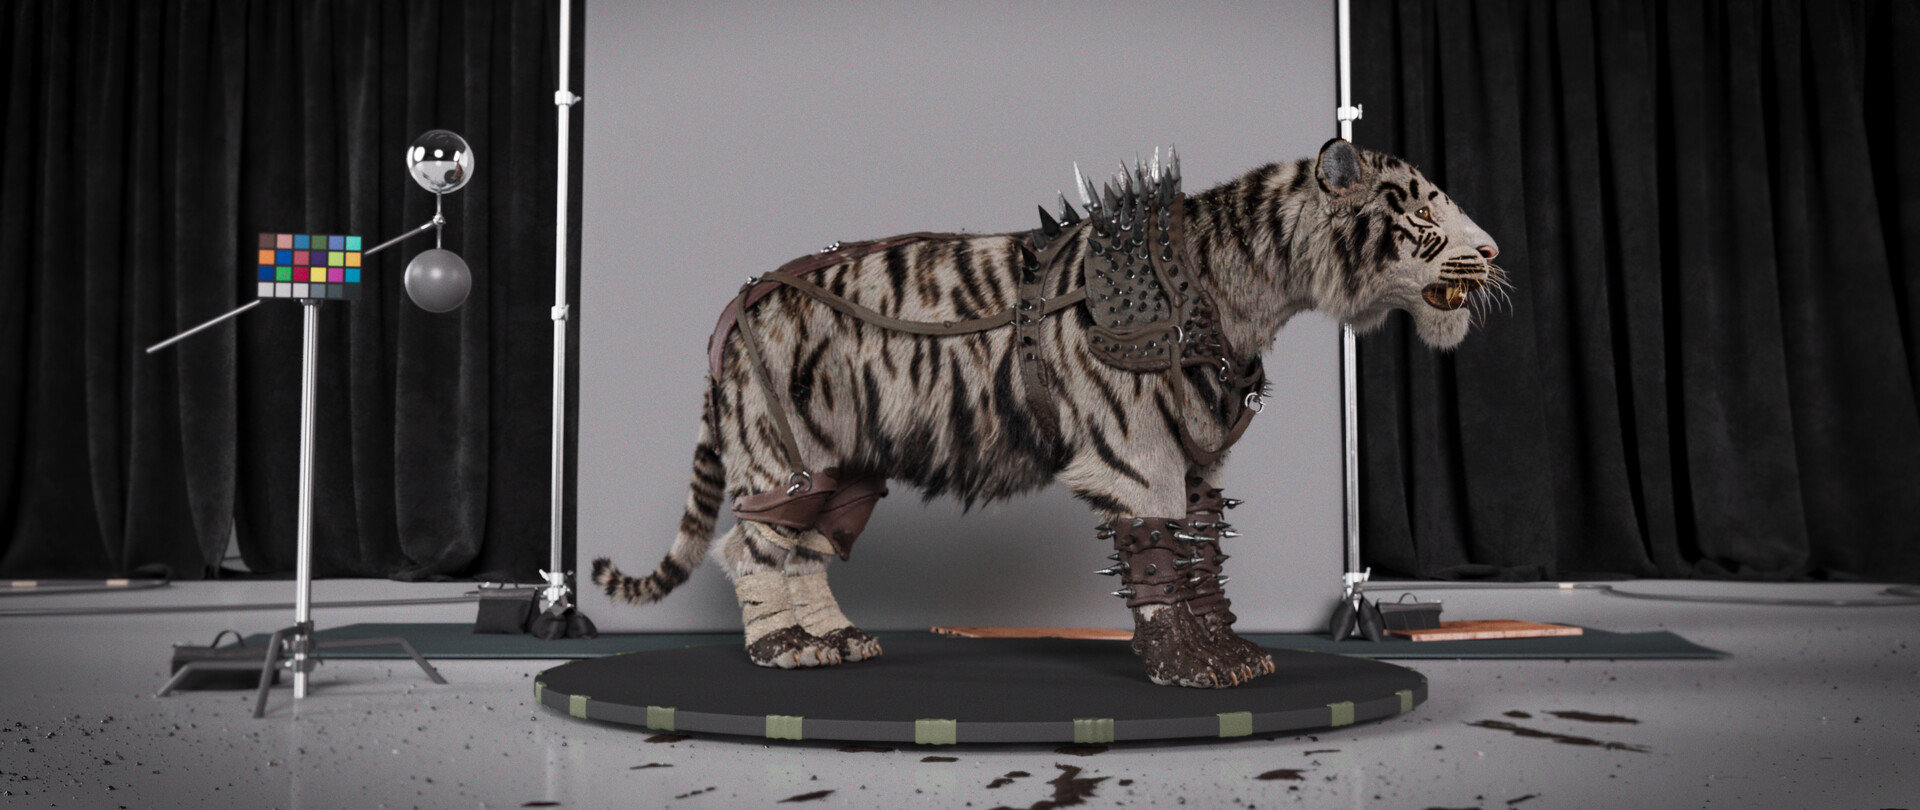
Learn how to create convincing creature grooms in Houdini with this 3-hour workshop by Groomer at Digital Domain, Luis Cadavid. A discussion of the concepts and tools that are used in this workshop takes precedence at the beginning before Luis jumps into Maya to explore his creature model. At this stage, the importance is on getting to know the volumes that will be used to create the creature groom and involves observing lots of reference materials before exporting the model to Houdini.
Once in Houdini, Luis provides an introduction to how Houdini creates hair before he prepares all of the objects and creates the various VDBs, and separates the mesh to create the groom. You’ll learn how to take advantage of the tools that Luis widely uses, including the Curve Advect Tool, Guide Process: Bend, Guide Process: Set Direction, Guide Process: Lift, Length, Curve Mask, and Noise Mask. You’ll also discover how to create your own custom shortcuts to make your workflow faster and more efficient.
With knowledge of all the tools defined, Luis then starts the process of creating the guides for the face of the werewolf, adding volume and shape to the guides using various attributes. He creates the hair and various sized clumps before moving on to creating the guides for the body, legs, ears, and tail. He also paints the attributes that he will later combine together. Once the first pass of the groom is done, Luis shares how he tests materials and HDRIs and sets up the camera so he can get an idea of how the groom is working.
By completing this workshop, you will have covered all of the bases needed to begin creating your own grooms. This tutorial is intended for artists with a basic to medium level of understanding of grooming.
The model and textures featured in this workshop were created by Felipe Gomez.
18 Lessons
In this lesson, Luis outlines the foundational workflow for creating a creature groom in Houdini. He emphasizes that thorough preparation, reference gathering and organized project setup are essential before starting hair or fur work. While Houdini can seem complex, Luis shows that its initial setup is similar to Maya and becomes manageable with a well-structured workflow.
Duration: 8m 38s

In this lesson, Luis goes over the essential project setup in Houdini before starting character grooming. Proper organization, separating geometry and setting up technical elements, like VDBs at the right resolution, creates a solid foundation for later grooming work. Although time-consuming, this preparation is crucial for a smooth workflow when painting attributes and building hair systems in the next stages.
Duration: 12m 23s

In this lesson, Luis introduces key concepts for Houdini’s hair workflow, including the automatically generated node structure for hair systems. While the nodes can be explored, he emphasizes that basic hair creation doesn’t require manual setup. The focus is on adjusting technical parameters, like density and relaxation, to achieve natural and believable hair distribution.
Duration: 5m 52s

In this lesson Luis introduces the Curl Advect guide process in Houdini, an intuitive and efficient method for establishing hair direction and flow. By simply drawing curves, he shows how artists can quickly define how hair guides behave across a character's body, with the flexibility to refine and add detail as needed. This tool is particularly valuable for working with short hair and provides a solid foundation that can be further enhanced with additional deformation techniques in subsequent steps.
Duration: 4m 16s

Building on the previous lesson, Luis shows how to refine hair guides using the Blend Guide process. He demonstrates combining multiple operations and using separate guide nodes, which makes the workflow more organized and easier to adjust. This modular approach, applying each effect separately, gives greater control and clarity over the grooming process.
Duration: 6m 26s

In this lesson, Luis shows us the Set direction process, a simple but effective way to control the immediate orientation of hair guides. While not every process will be necessarily required for every character, Luis demonstrates Houdini's flexible, layered approach to grooming where multiple effects can be combined and adjusted non-destructively.
Duration: 2m 53s

In this lesson, Luis demonstrates the Lift Guide process, a key part of digital grooming that controls how far hair sits from the skin surface. He keeps the explanation simple, presenting it as foundational knowledge that will lead to more advanced techniques. This step-by-step approach helps learners get comfortable with basic guide tools before moving on to complex character grooming projects.
Duration: 2m 47s

In this lesson, Luis demonstrates the Set Length guide process, a fundamental node used in most grooming projects to control hair length. By practicing and repeating this process, viewers build familiarity with the guide process. These foundational skills will later support creating more complex and detailed character grooms.
Duration: 2m 13s

In this lesson, Luis shows us the Frizz guide process, a versatile tool for adding realistic irregularity to hair. Combined with curve-based masks (root-to-tip control) with percentage-based selections, that provide precise control over both the location and distribution of the effect, artists can achieve everything from subtle texture variation to dramatic flyaway effects. Understanding these masking principles is essential as they apply throughout Houdini's entire hair grooming workflow.
Duration: 4m 6s

In this lesson, Luis walks through his workflow optimization for hair and curve grooming using keyboard shortcuts. He explains the benefits of creating personalized shortcuts while sharing his own setup as a reference. Viewers are encouraged to develop their own preferences, but following Luis’s system can help maintain consistency when working through future tutorials.
Duration: 3m 28s

In this lesson, Luis focuses on the character groom, showing how he sets up control systems for hair on the head and shoulders. He uses Paint Attributes, groups, and masks to stay organized and clearly visualize the hair placement. By combining multiple attribute maps and converting them into groups, artists gain precise control over where hair appears across different areas of the character.
Duration: 19m 26s

In this lesson, Luis goes over proper collision setup with VDBs, attribute-based control systems, and efficient guide placement techniques for his character hair goom. Once complete, he paints in attribute maps for length and hair density control, and uses symmetrical workflow practices, to create a flexible and artist-friendly grooming pipeline.
Duration: 13m 1s

In this lesson, Luis works on refining his results with a methodical, layered approach to realistic hair grooming that relies heavily on painted attribute maps for artistic control. He shows artists how to use proper naming conventions for proper hair distribution, and how multiple clump layers work together to create natural-looking hair.
Duration: 28m 57s

In this lesson, Luis demonstrates the importance of setting up the render and shader early in the hair grooming process, rather than relying solely on viewport preview. By establishing cameras, HDRI lighting and proper Arnold shaders with melanin and color ramp controls, artists can make informed decisions about hair thickness, density and problem areas that need fixing.
Duration: 10m 13s

In this lesson, Luis follows many of the same steps from the previous lesson, relying heavily on painted masks and attributes to achieve precise control over fur placement and styling. If done correctly, this modular system allows for non-destructive adjustments that can be applied consistently across different areas of a character.
Duration: 18m 35s

In this lesson, Luis continues to work with the rest of the body. By repeating the same foundational technique across different body parts and using UV maps to control hair properties in more hard to access areas, the artist achieves realistic and art-directable results. The workflow's strength lies in its modularity and the ability to preview and adjust each element independently before combining everything for final rendering.
Duration: 21m

In this lesson, Luis demonstrates how to make a finished groom follow the character model, setting up a pose and a turntable for presentation. He emphasizes the importance of correctly connecting guide deformers to animated geometry and shows practical ways to transfer the groom to a posed character, even when the topology doesn’t perfectly match. These techniques are essential for bringing completed groom work into final presentation and portfolio-ready renders.
Duration: 18m 46s

In this final lesson, Luis reviews the adjustments made since the previous session and presents the completed character groom setup. He covers material layering, render settings, HDRI lighting, and proper map usage to achieve realistic results. Luis wraps up by encouraging artists to apply these techniques to their own projects and offers continued support through further tutorials and direct feedback.
Duration: 2m 36s

Primary tools
For this workshop you’ll need:
Project Files
By downloading these workshop files, you’ll be able to follow the same steps as Luis Cadavid and create your own unique groom work. These files include:
- High-resolution textures (.tif, .exr) – Detailed texture maps for all aspects of the character used in this workshop
- Environment & pose assets (.abc) - Ground elements used in the creation of the final shot, as well as the character prepared in a pose
Skills Covered
Who’s this Workshop for?
This workshop is designed for digital artists with basic to med-level grooming experience who want to advance their creature hair creation skills in Houdini. Moreover, it's sure to be valuable for character artists, groom specialists, and VFX artists working in film and game production environments.
With hair and fur being a major part of most character and creature designs, the lessons presented by Luis Cadavid are guaranteed to help artists enhance their work with professional-grade techniques and efficiency. Combined with Luis’s comprehensive knowledge of industry-standard grooming processes, quality expectations, and his custom workflow optimization, viewers of all levels will learn useful skills in this workshop.
Learning Outcomes
By completing this workshop, artists will have mastered the essential tools and workflows needed to create convincing creature grooms in Houdini using professional production techniques.
Key skills include:
- How to analyze creature anatomy and prepare models for optimal grooming workflows.
- How to utilize VDBs and mesh separation techniques for organized groom creation processes.
- How to master essential Houdini grooming tools, including Curve Advect and Guide Process functions.
- How to create custom shortcuts and workflows to increase grooming efficiency and productivity.
- How to build realistic fur guides with proper volume, direction, and natural flow patterns.
- How to paint and combine attributes for realistic hair variation across different body regions.
- How to test materials and lighting setups to evaluate groom quality during production.


